> For the complete documentation index, see [llms.txt](https://help.tokenpocket.pro/en/llms.txt). Markdown versions of documentation pages are available by appending `.md` to page URLs; this page is available as [Markdown](https://help.tokenpocket.pro/en/wallet-management/token-management/transit-buy.md).
# How to buy crypto in TokenPocket
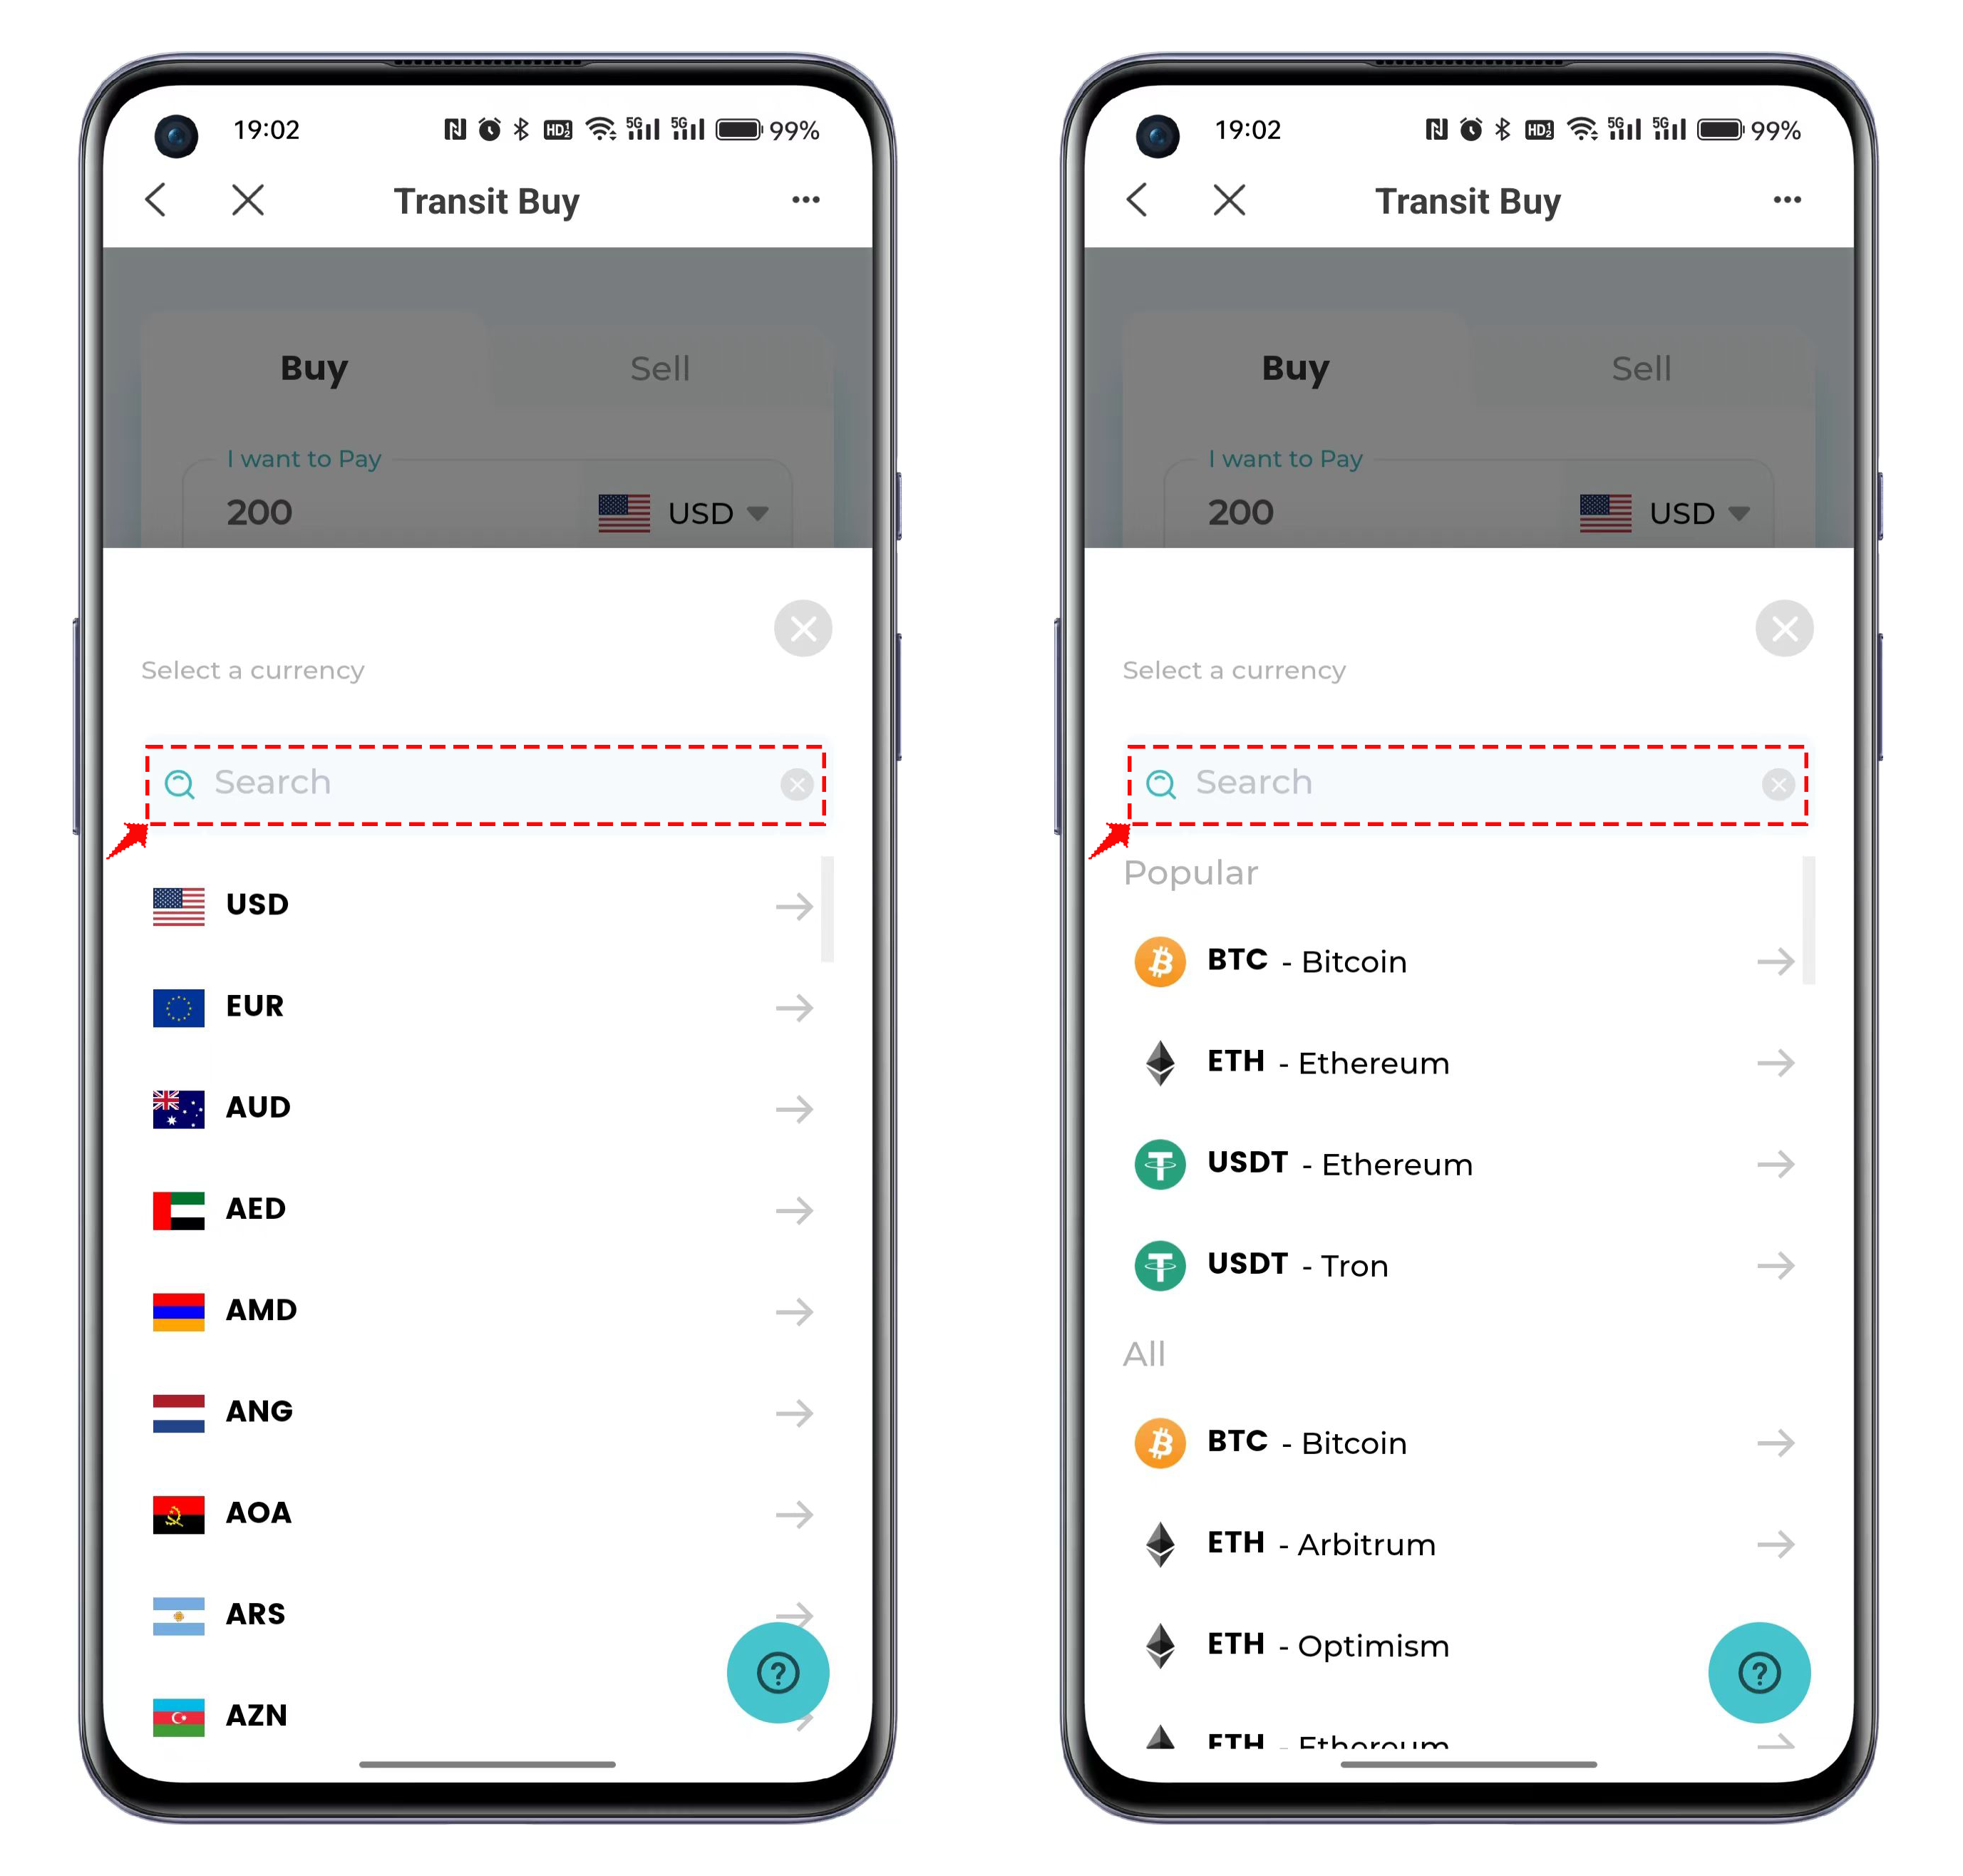
1. Open TokenPocket, click on Transit Buy \[Buy], to enter the Transit Buy transaction interface. The default screen is the Buy screen. After configuring, click \[Next] to proceed to the next screen.
Here, you can choose the fiat currency of different countries (for example, here we have selected USD), and you can select supported tokens as the exchange target tokens below (this tutorial uses USD to USDT exchange as an example).
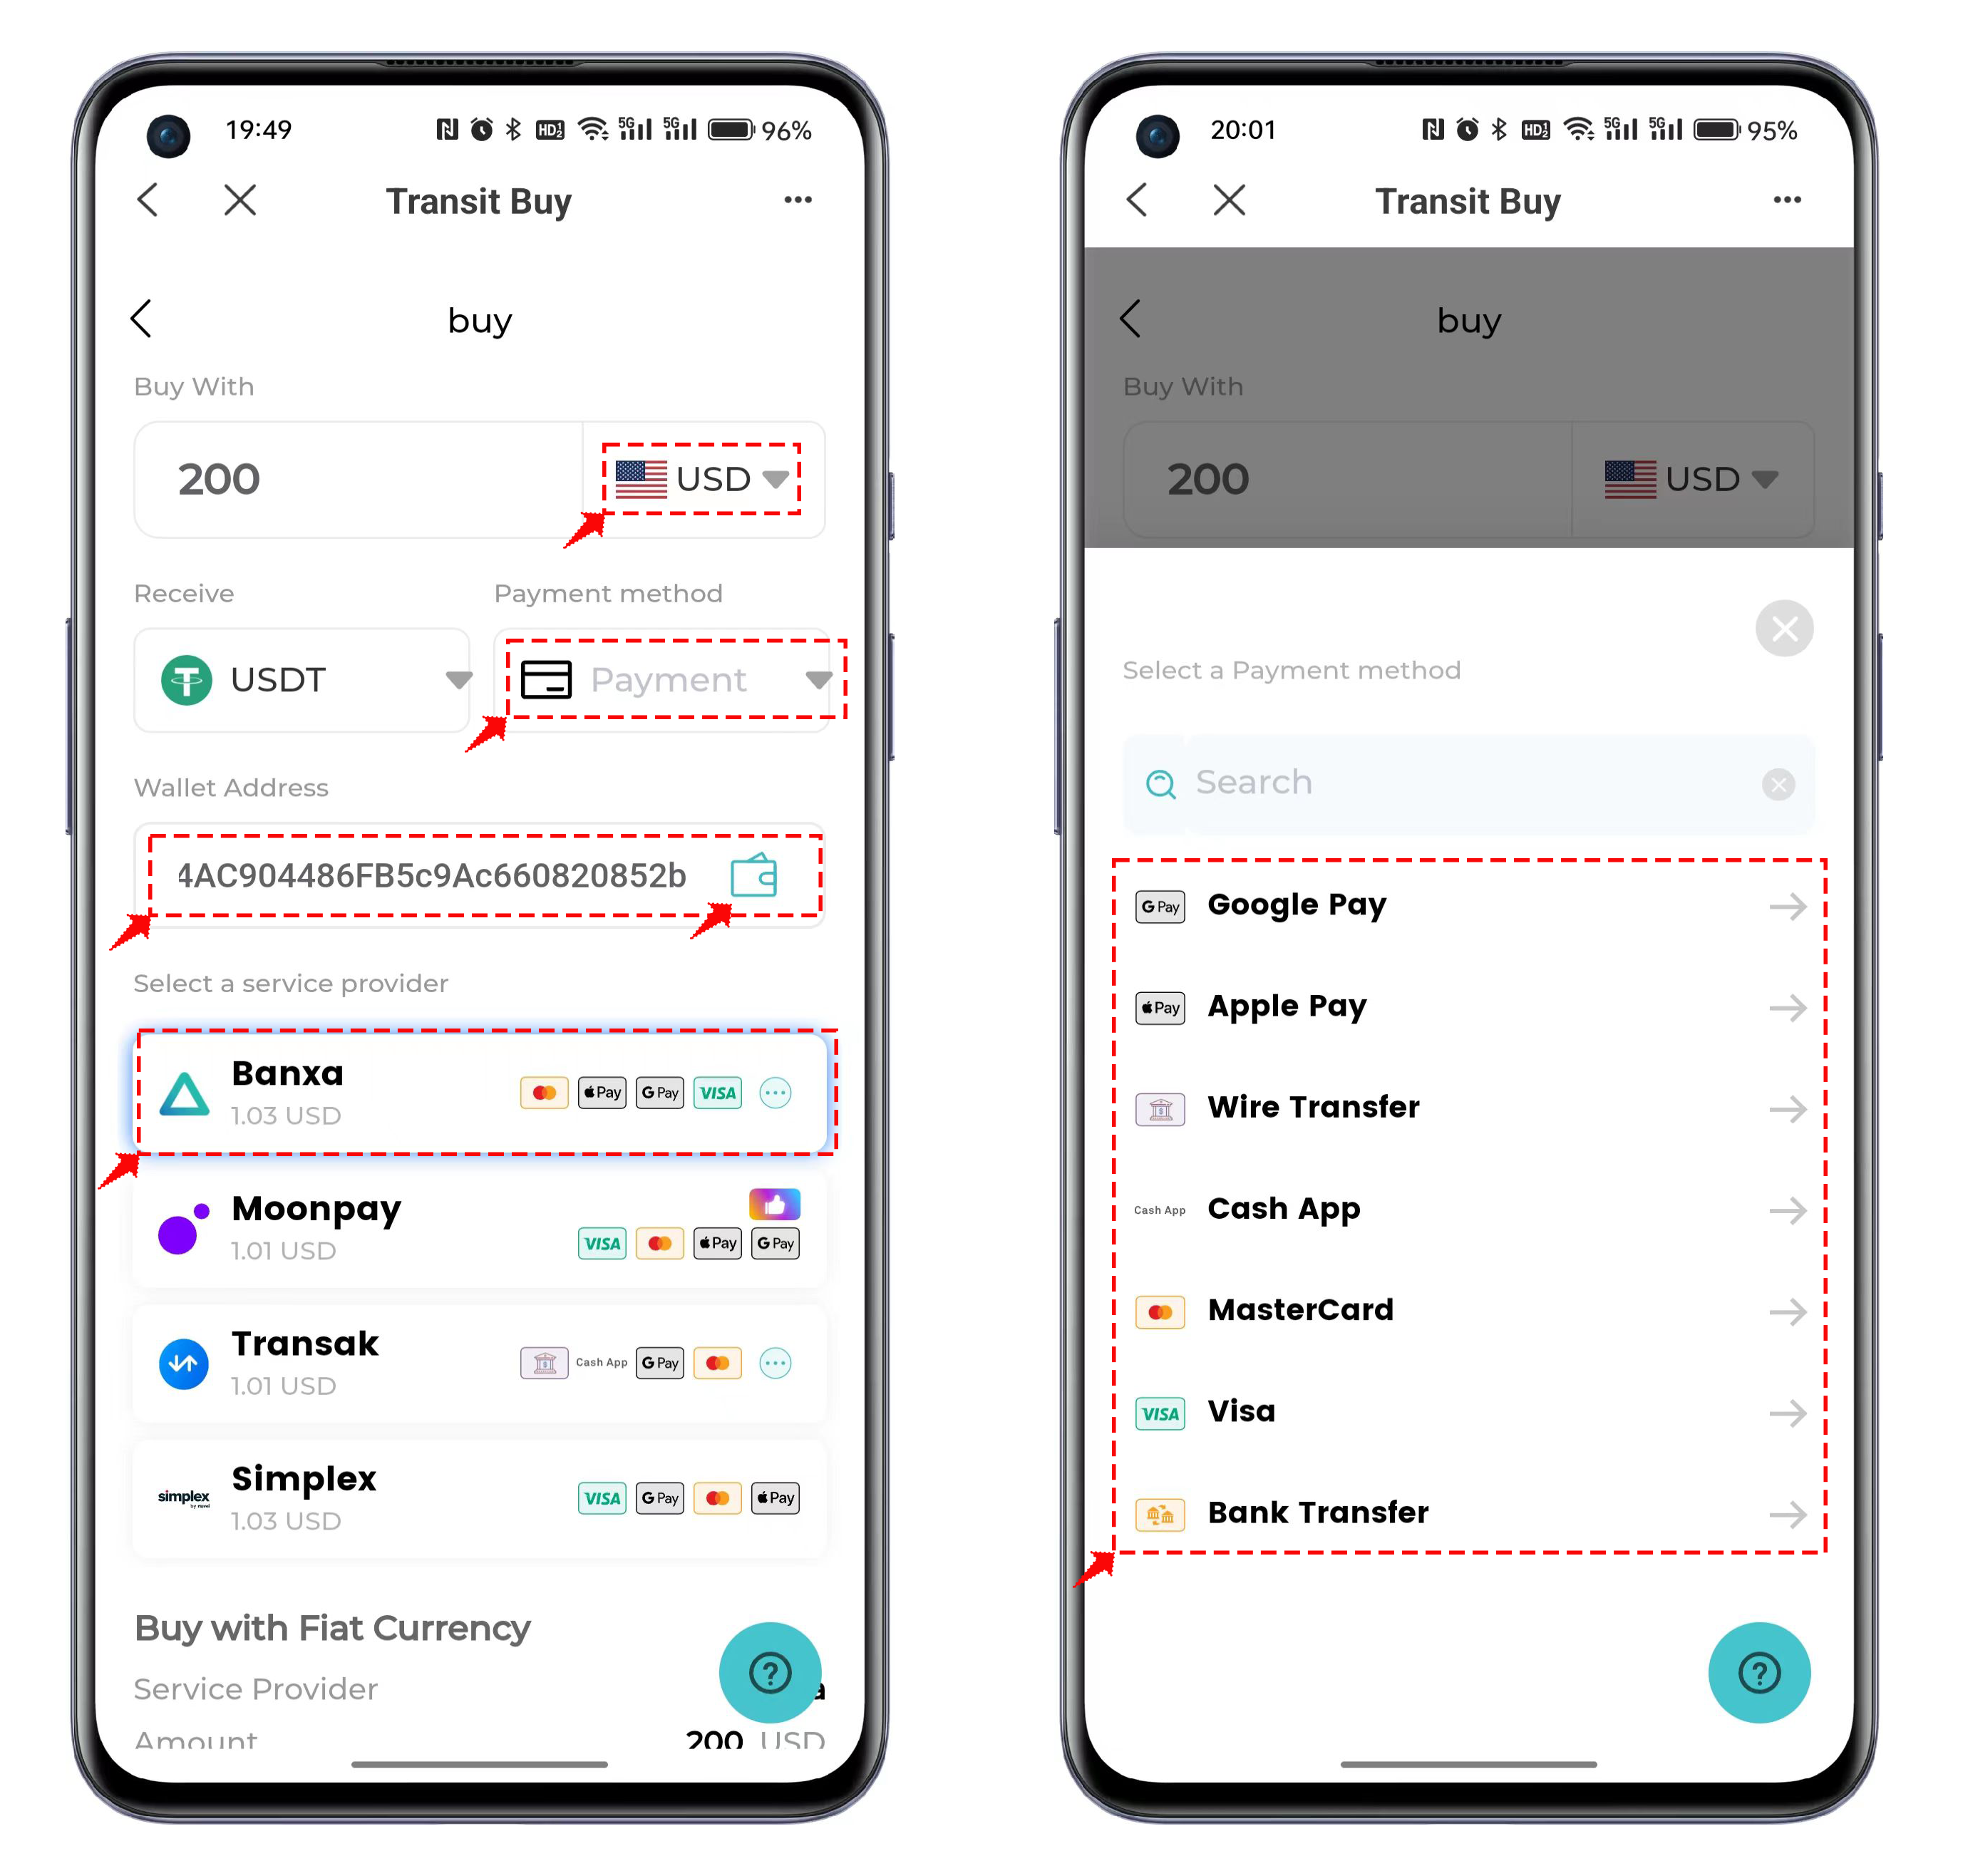
2. Inside the interface, select \[Payment] and choose a payment method from the list. For example, here we choose \[Google Pay] as the payment method.
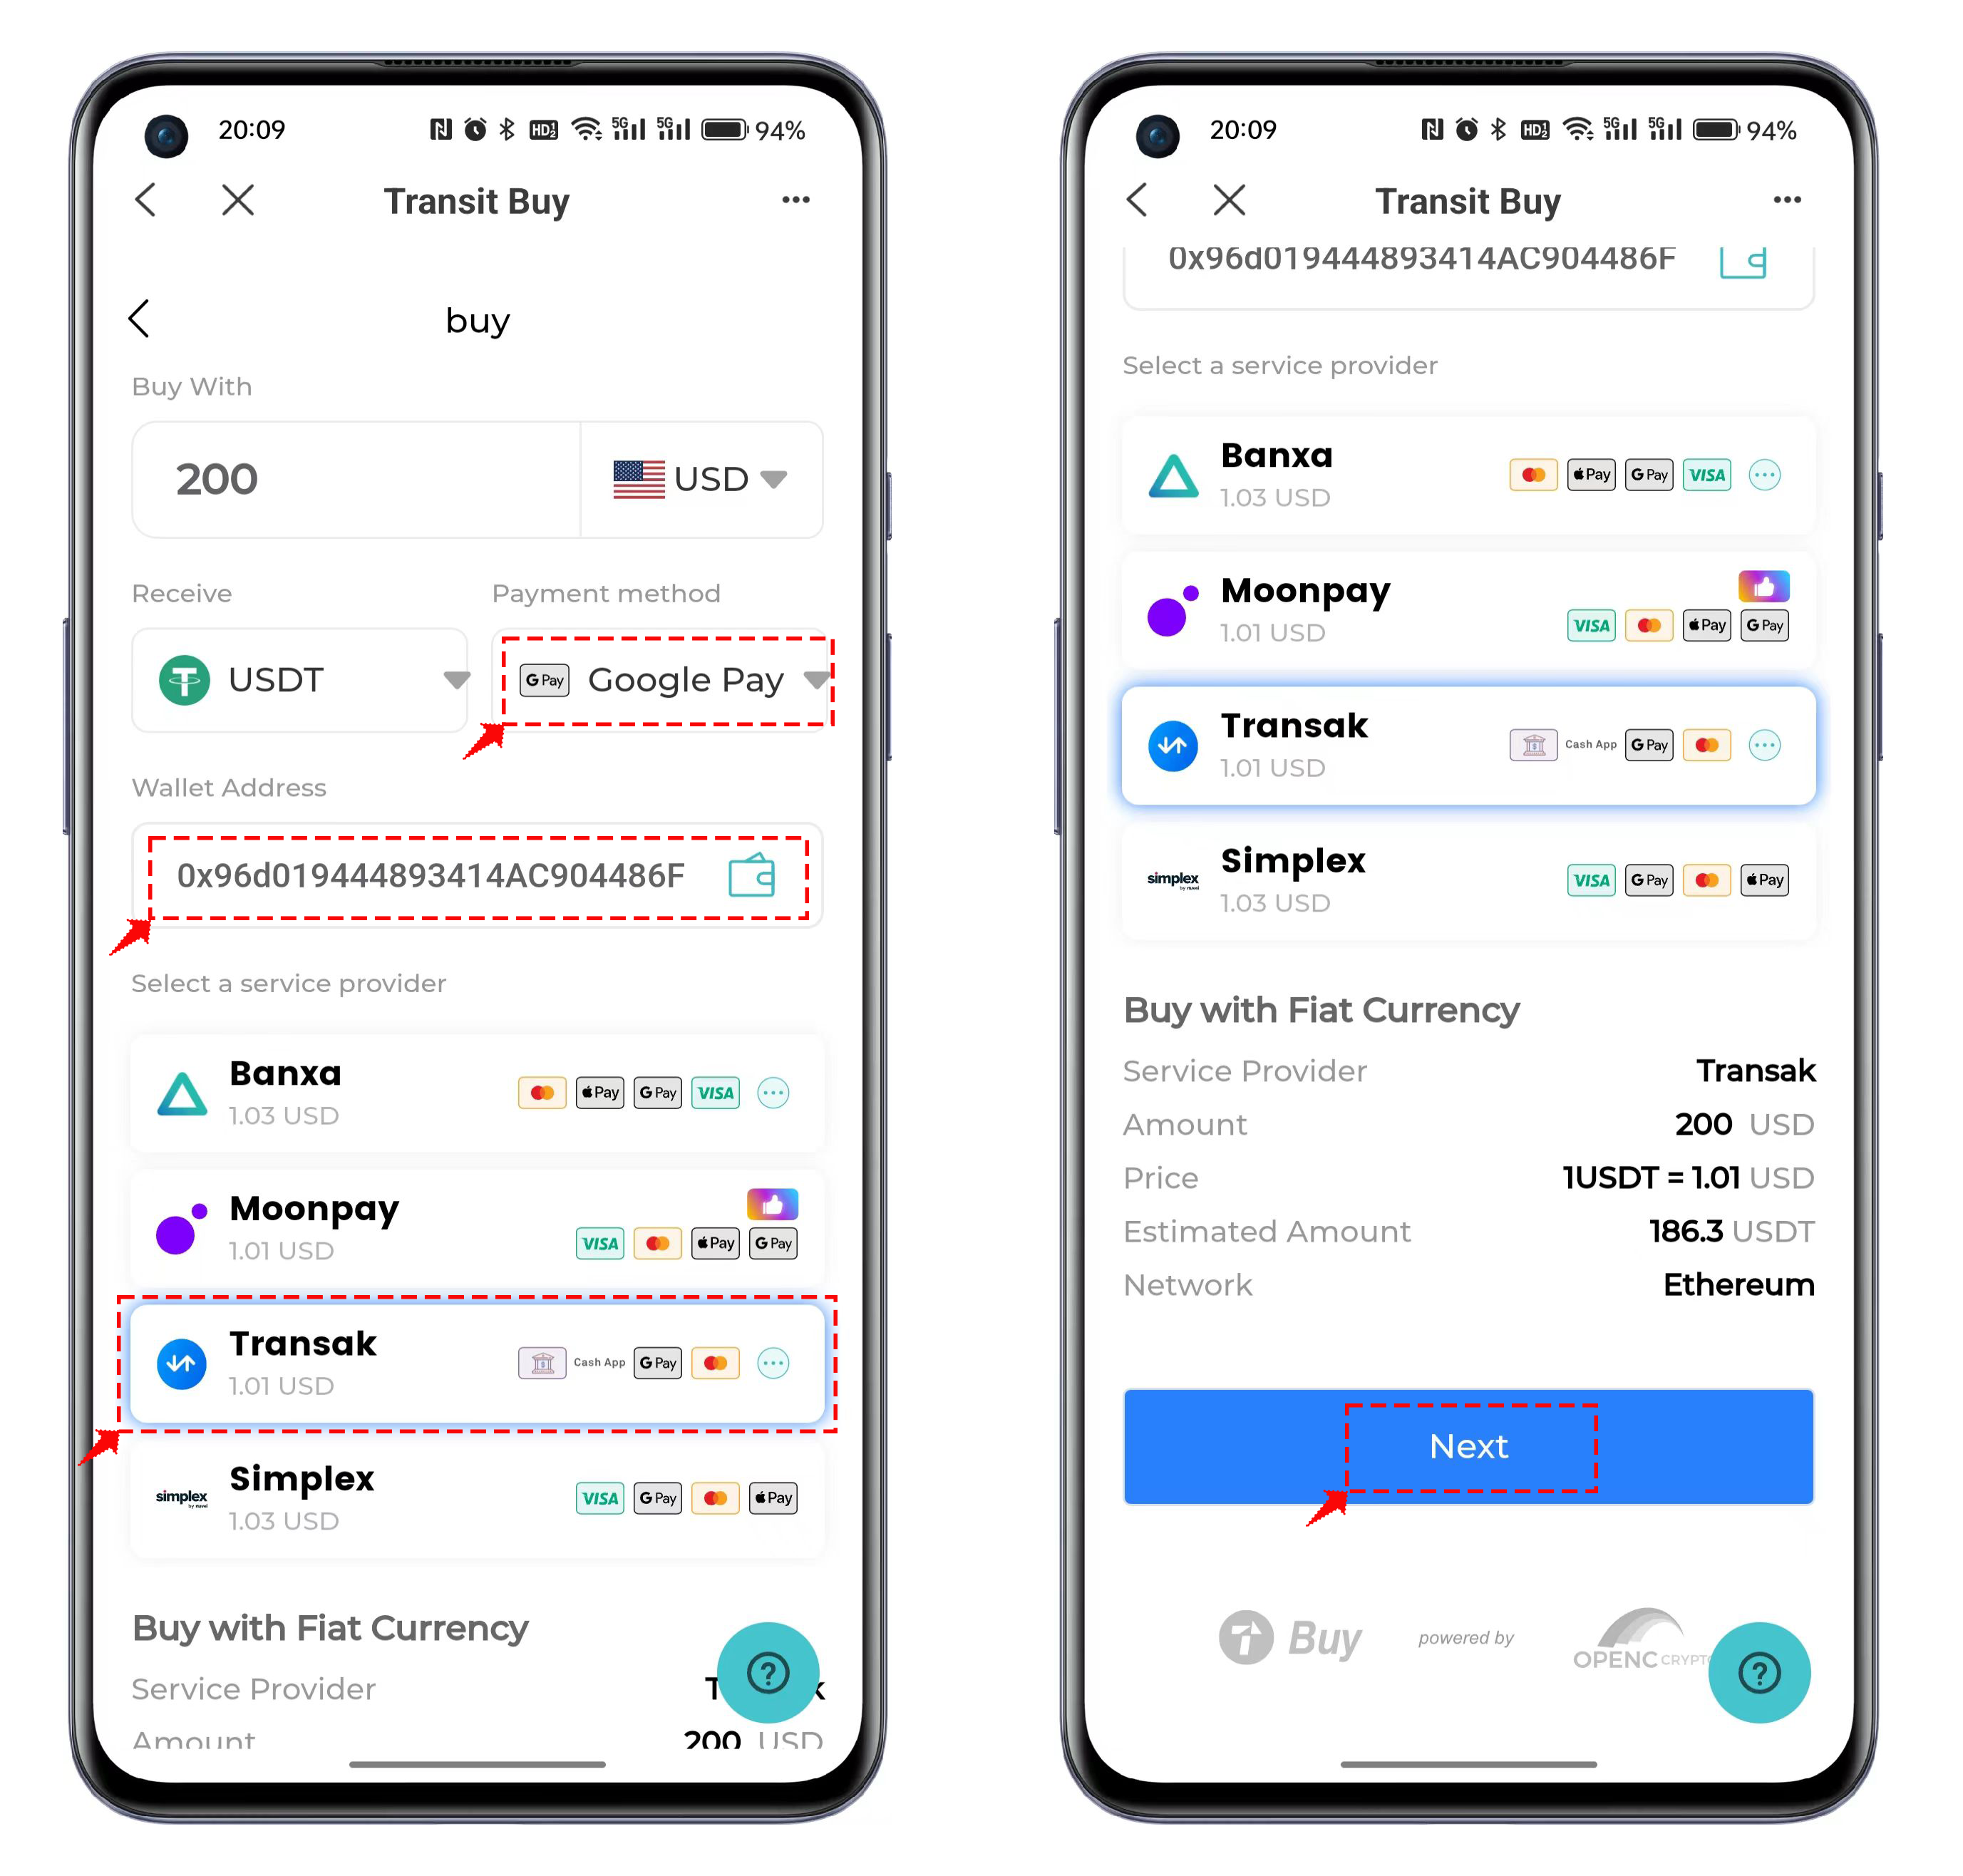
In the receiving address field, you can directly enter the address where you want to receive the tokens, or you can click on the wallet icon to select an address that you have already imported into TokenPocket as the receiving address. You can also choose the service provider below, for example, select the Transak service provider. Scroll down to the bottom of the interface, and click \[Next] to proceed to the next screen.
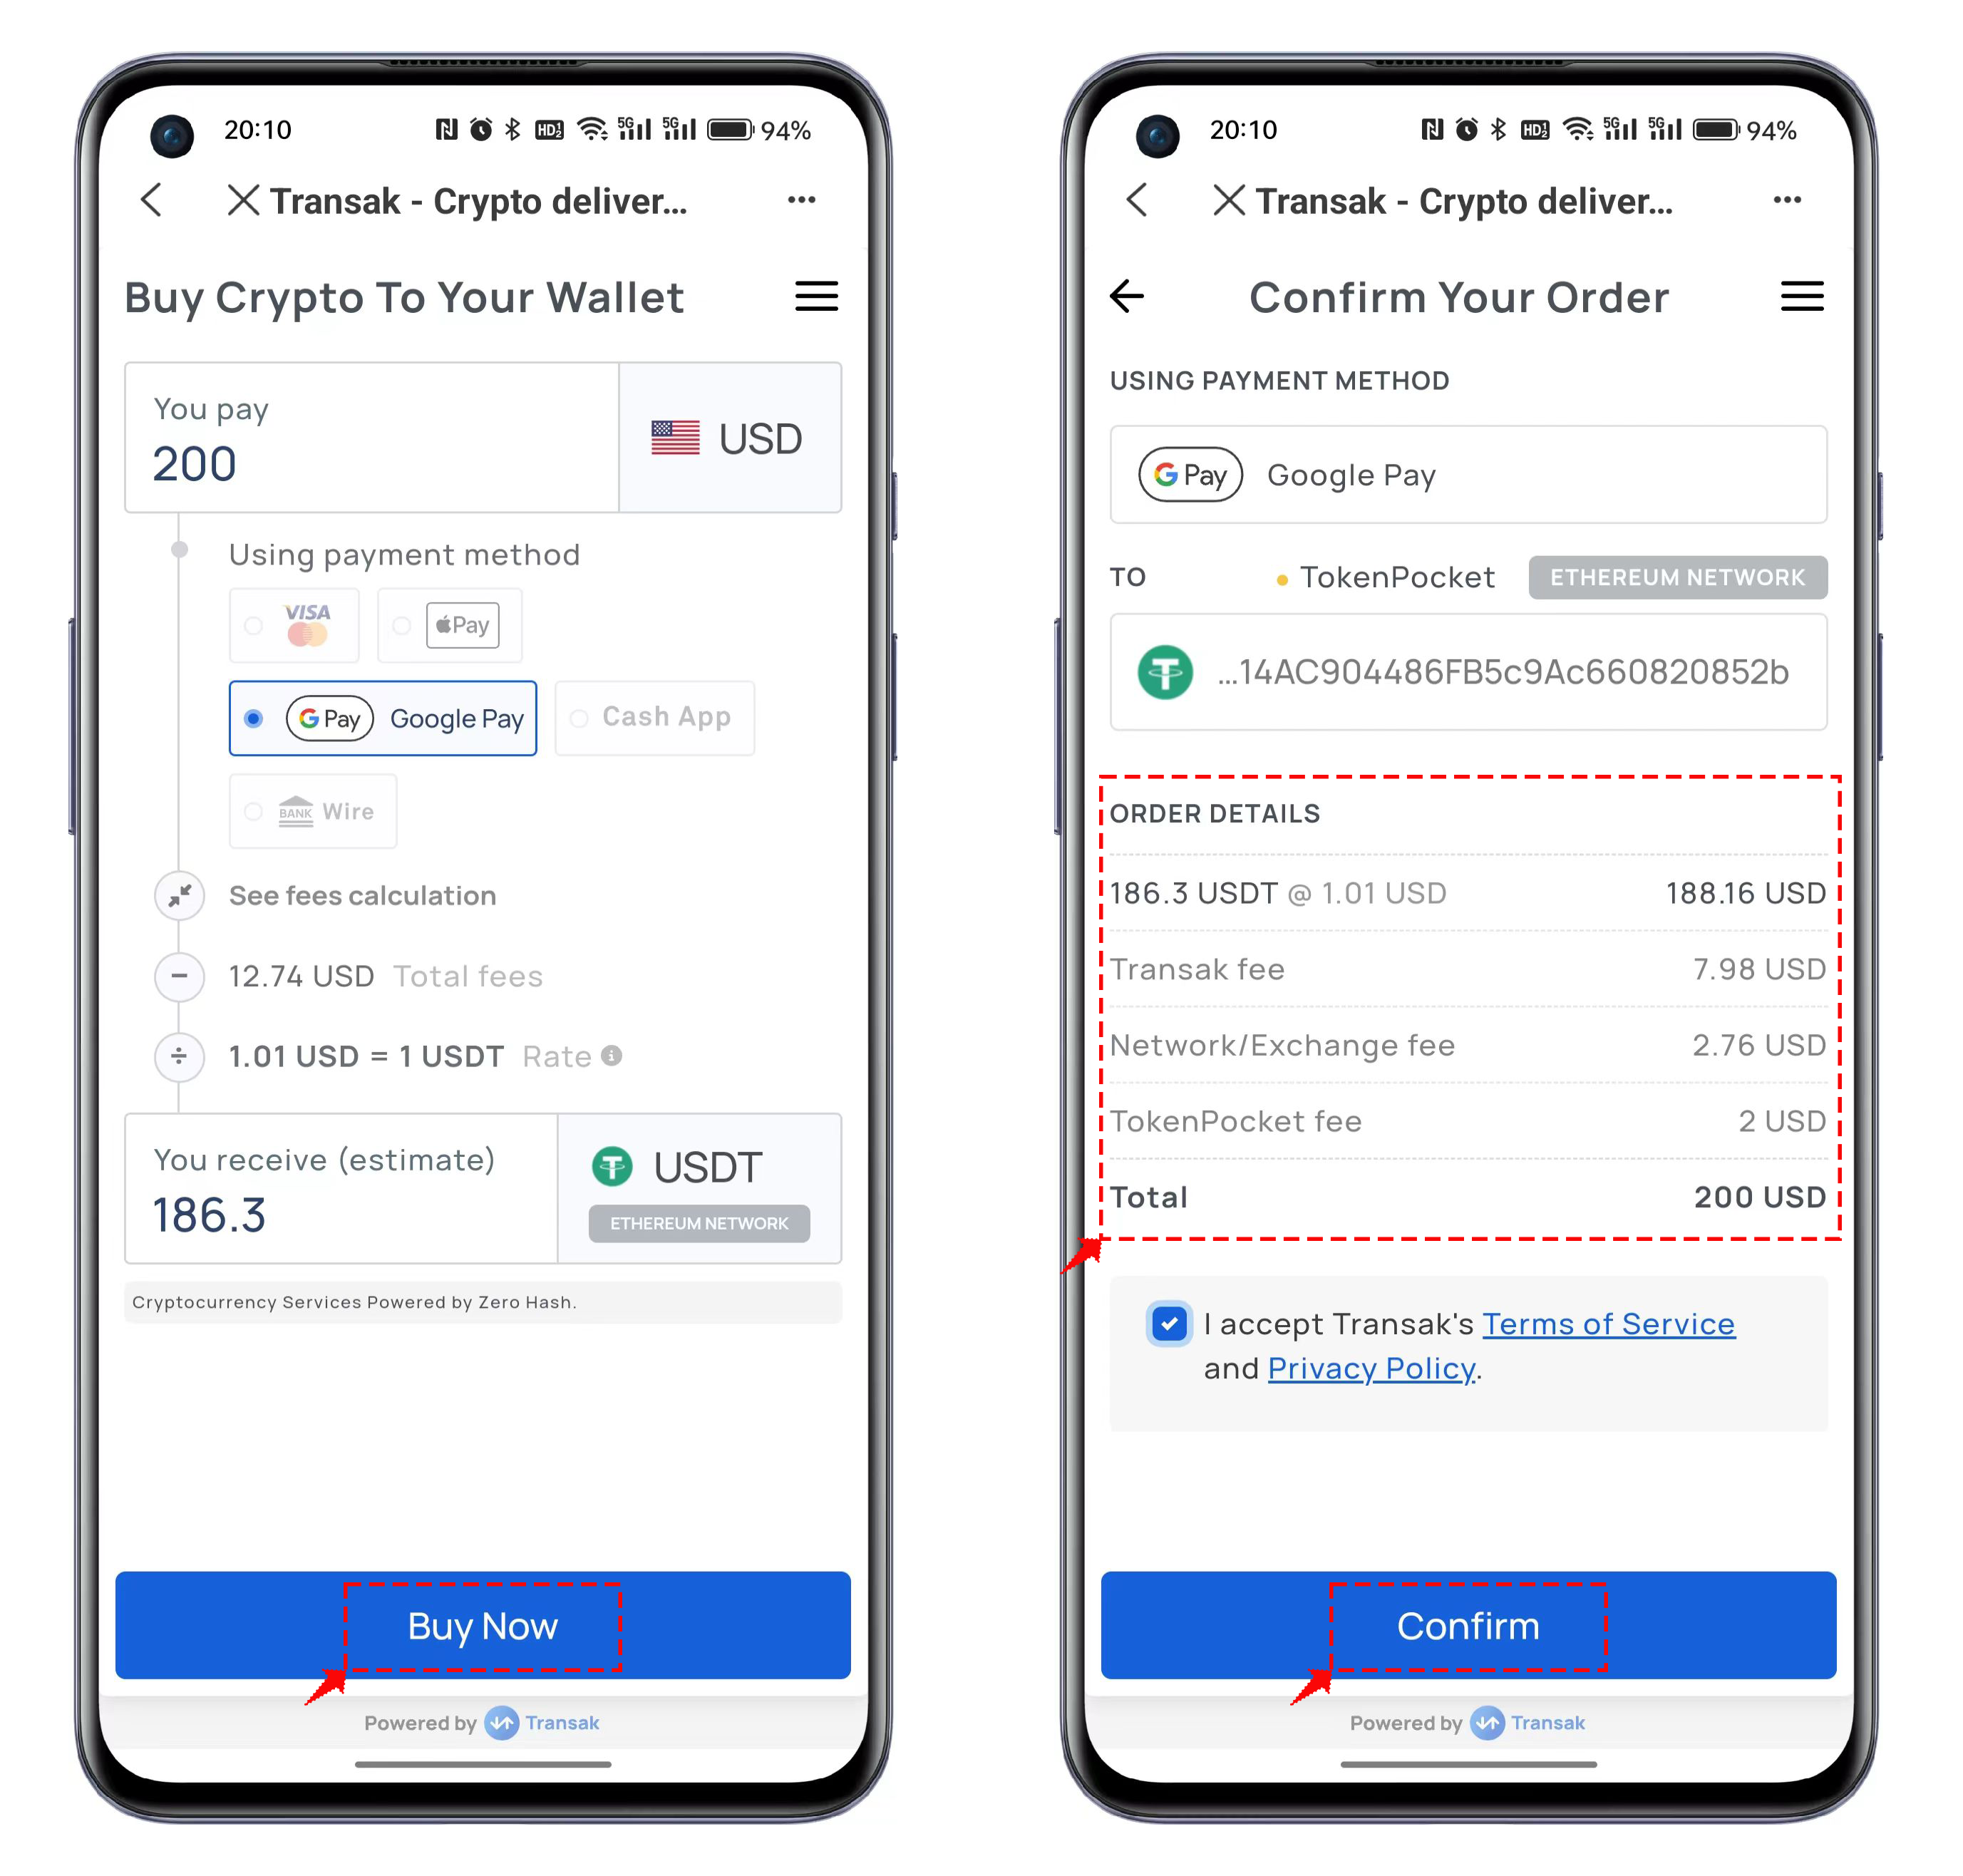
3. The interface will automatically redirect to the service provider's dedicated page, with \[Google Pay] selected by default. Click \[Buy Now], and you will be asked to enter your email address and receive a verification code via email for login. After logging in, if it's your first time using it, you may need to complete KYC verification. Once the verification is completed, you can access the exchange details, and then click \[Confirm] to proceed to the final payment page.
4. In the payment interface, you can view the required USD assets for payment. Click \[PAY USD], and after the transaction is completed, you can expect to receive the exchanged tokens shortly.
---
# Agent Instructions
This documentation is published with GitBook. GitBook is the documentation platform designed so that both humans and AI agents can read, navigate, and reason over technical content effectively. Learn more at gitbook.com.
## Querying This Documentation
If you need additional information that is not directly available in this page, you can query the documentation dynamically by asking a question.
Perform an HTTP GET request on the current page URL with the `ask` query parameter:
```
GET https://help.tokenpocket.pro/en/wallet-management/token-management/transit-buy.md?ask=
```
The question should be specific, self-contained, and written in natural language.
The response will contain a direct answer to the question and relevant excerpts and sources from the documentation.
Use this mechanism when the answer is not explicitly present in the current page, you need clarification or additional context, or you want to retrieve related documentation sections.